Like most paper crafters out there, I have amassed a vast collection of patterned papers in all sizes, and, like many crafters, I often take them out, stroke, sniff and touch them but put them back unused. I have had some particularly inexpensive ones from The Works in recent months (around £3 per pad) and thought I’d share with you my makes from one of these pads.
I was drawn to this particular 12″ x 12″ pad by the colour palate of pinks and greens and the range of styles and designs in the pad. I noticed that a number of the pages had 4 designs on them so I set to work to see what I could come up with. I decided to use 2 of the smaller square panels for each 6″ x 6″card.
I used my Crealies Double stitched circular nesting dies (no33) on many of them which allowed me gut the lower layers leaving a nice stitched edging and use the die cuts on the upper layers of the cards.
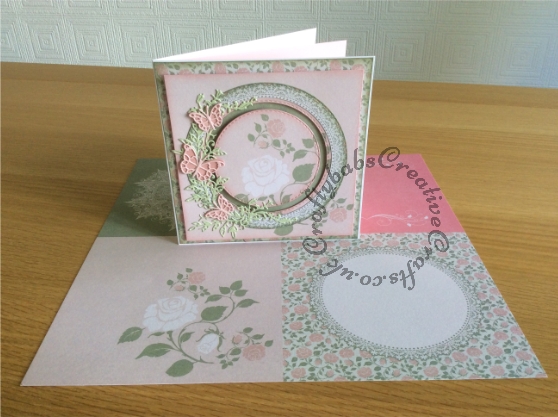
This first example was simply made layering up the nesting circles. To highlight the rose design, I dry embossed the petals with a large ball tool on the reverse and then with a small ball tool on the outlines on the right side. I then painted to rose with Windsor & Newton Iridescent Medium (it’s similar to what’s inside various sparkle/glitter pens on the market). To add interst and dimensionI inkd the edges with distress inks and use foam pads to layer up.
In this example, I used the same circle dies to cut out the printed circle motive from the paper and again inked and layered up the pieces with foam pads to create dimension. I then added die cut butterflies and vines cut from coordinating pearlescent card stock to embellish the card.
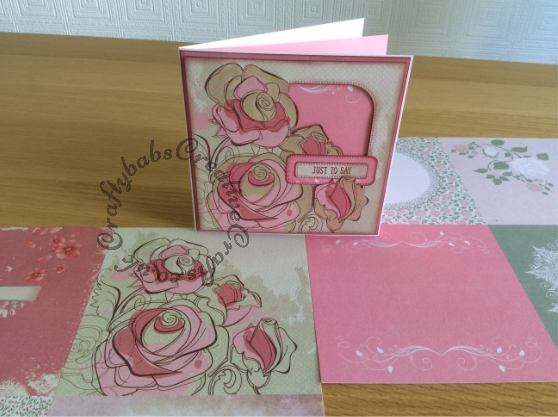
I wasn’t sure what to for this card initially. The rose printed design filled most of the square and I didn’t want to lose any of the detail. I decided to have my first try at partial die cutting. I chose the Nellie Snellen nesting Straight Dotted Square die as this seemed to work best on this particular paper square. I marked my die position in pencil first and then hand cut around the roses, fially slotting the die in place to give me the aperture. I stamped the sentiment onto the paper removed and cut a coordinating mat for it (with Nellie’s straight dotted rectangles) from the matting layer below (in an area that would be hidden by the top layer). A little inking round the edges and hey presto, a very effective card that was quick and easy to make.
Have found out that partial die-cutting was easier than I expected, I did the same thing on this version which, again, allowed me to use the design elements on the printed paper to it’s best advantage. Some inking and die cut embellishments helped me to achieve the finished look.
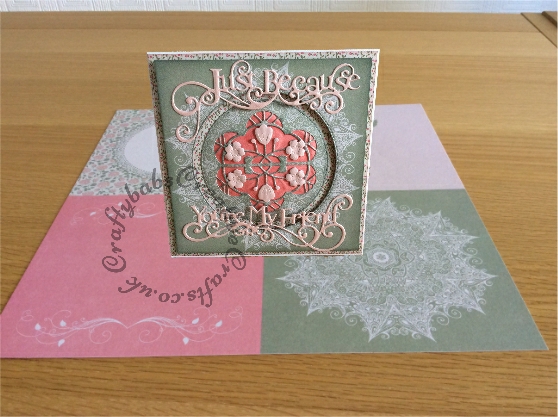
This last design had me stumped for a while. I couldn’t decide what to do with the mandala style design. Again, I used the double stitched circles to create layers and dimension. I used the Couture flower burst reflection die to create the centre piece and double cut in pink to create to flower embellishments. I dry embossed the underneath layer of the centre circle to create a dome which i supported with foam pads when adhering it to the card. I left all of the cards fairly blank so that I could add relevant greetings when I came to use them. In this case, I sent the card to a special friend and used the Tonic ‘Just Because’ sentiment dies to add the greeting.
And there you have it, 5 ideas from one paper stack that used less than 3 of the sheets from the stack so there’s plenty more left to explore with. Hope you liked them. Happy Crafting. Babs xx


