From the moment she became engaged, it was clear that my daughter wanted to enlist some help with the wedding preparations. Like most crafters I have amassed a wealth of all things crafting and tried my hand at numerous different crafts. I thought it would be nice to share this very personal journey of applying my stash and various skills to helping make my daughter’s day as special as it could be. I’ve done everything from Computer designing, Printing, Die cutting, Painting, Colouring, Shrink art, Pyrography to Hand and Machine sewing. My daughter had very clear ideas about what she wanted and we made an awesome team. Here are the finished results of our labours. To see full sized images just click on the image you want, it will also then give more details.
Save The Date
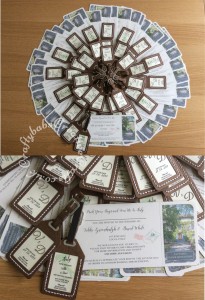
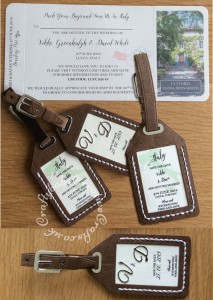
As soon as the venue were able to confirm the date, our first task was to organise some form of save the date invitations. The wedding was going to be in Italy and guests would need ample notice to make arrangements and plan ahead. My daughter had the idea of a luggage tag and boarding pass. We looked at my die collection and realised that though I had lots of tag dies, none of them were really what she was looking for so we looked around and found the perfect solution in the form of the X cut 9 pc large die set LUGGAGE TAGS. We decided it would look more professional if the centre section of the tags was printed but added small monogram silver die cuts. As the tags were to be double sided this meant doing 2 insert sections which were glued back to back (sizing was crucial to fit into the tag aperture). The main tags were cut from brown leather effect card which was then inked with distress ink. The inserts were glued in between two tag die cuts which I then stitched together using both pink and blue embroidery thread (the trickiest part of this was making sure the ends of the threads were hidden in between the layers). I cut the buckles from silver mirror card using 2 die cuts glued back to back as they would be seen from both sides. Once assembled, I attached a piece of magnetic tape to the back of the tag strap so it could be used as a fridge magnet. The ‘Boarding Pass’ was used to include the extra information guests would need. These were printed and then cut to size on the guillotine, a perforating blade was used on the end sections to create an authentic looking boarding pass and a corner rounder punch was used to complete the look. (To see full size images, just click on the pictures)
Hen Party Fun
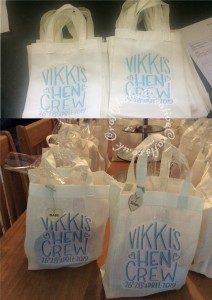
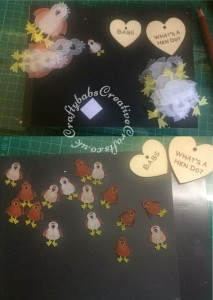
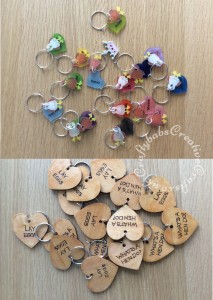
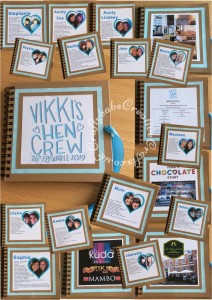
Much of my crafty input for the hen party was kept secret from my ‘Bride To Be’ daughter whilst I worked with my ‘Matron Of Honour’ daughter to devise some fun goodies to contribute to the Hen Party. A friend of the bride designed a logo which we used on many of the hen party trimmings. Another friend used it to make vinyl cuts to trim and personalise cups and champagne glasses for all the hens. I used the logo to print iron-on transfers for the goody bags which I made from cotton curtain lining. I bought wooden heart keyrings which I wood-burned with a hen party joke and then varnished. I also wood-burned smaller hearts to make name tags for the goody bags. I made wine glass charms from shrink plastic using Sizzix bird and heart die cutters. I had asked the hens for various facts about their relationship with the ‘bride to be’ and a photograph of them with her. I used this to make a hen party keepsake album with the team logo on the front. This included the weekend’s events, pictures of the places and a page for each hen. I left lots of empty pages for photographs and mementoes to be added later. (To see full size images, just click on the pictures)
Itinerary, Welcome & Special Thank You’s
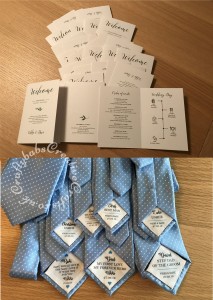
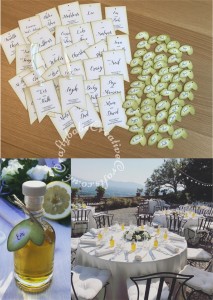
All of the wedding guests were staying at the wedding venue and my daughter and her partner wanted to make each guest feel welcome and invloved. They provided a welcome pack for each guest and wanted to include an itinerary so everyone would know what to expect and when. We designed and printed welcome name tags to go on each guest’s bedroom door and an itinerary of the week’s events. We also needed name cards for the wedding breakfast and came up with the idea of attaching named tags to the wedding favours as this would save room on the tables. As the wedding favours were to be bottles of Olive oil (the venue was an olive estate) we came up with the idea of a leaf shaped tag. The most difficult part of this was sizing and arranging the printing so that we included the timeline that they wanted and that the printed names would fit inside the dies we’d chosen to cut the tags (Tattered Lace Die Kaleidoscope Leaves and Sizzix Plus-size Framelits Banners #2 ). The itinerary cards were easy to cut and score. The leaf and door tags were die cut and then inked with distress oxide inks then hole punched to allow the addition of ribbon and twine. My daughter had seen some personalised tags that could be added to ties and wanted to do this for the special men in the wedding party. To save costs, I was able to print the messages she wanted onto Tshirt transfer paper then iron them onto fabric. I then made small square patches from these which I hand stitched into each tie. (To see full size images, just click on the pictures)
Table Decor, Dad Decor and Extra Special Keepsake Home Decor
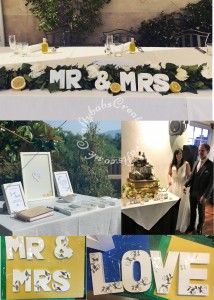
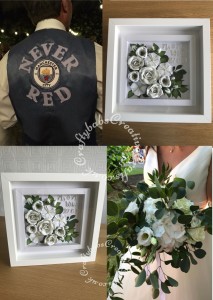
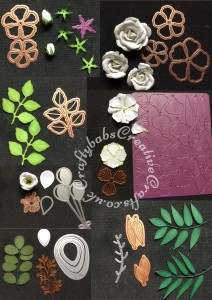
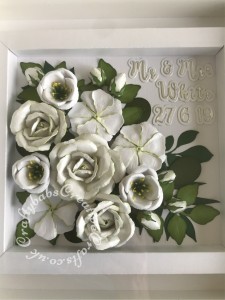
My daughter bought some large letters spelling the word LOVE and MR & Mrs which she wanted to use as table decor. These came in basic brown. We had a fun afternoon painting them all white and then decorated them with Silver mirror card die cuts (using the Spellbinders Romantic Vines dies) and various sizes of flat backed pearls. These were used at the venue in Italy on the top table and the guests signing in table and also used again at the reception party back home 2 weeks later. I also had a request from my husband to decorate his waistcoat for the wedding. My husband and 2 daughters are all fanatical Manchester City Fans, my daughter’s husband happens to be a Manchester United Fan. My husband used to have a favourite MCFC Tshirt bearing the slogan ‘Never Red’ (long since worn out), and wondered if I could put that on his waistcoat to be revealed when he got up to do his ‘Father Of The Bride’ Speech. I bought an embroidered MCFC badge from Ebay and then die cut letters from 2 layers of felt (fused together) using the Cardmaking Magic Die Solid Alphabet Die set. I then machine stitched these to the back of his waistcoat. He was delighted with the results and it went down a storm at the wedding. Half of the guests wanted to destroy it whilst the other half wanted to buy it off him. My final make was to be a wedding card. I have made hundreds of special cards for all kinds of people over the years. My dilemma was how to make the most special card of all for my beautiful daughter on her very special day. As you can imagine, we were very busy leading up to the wedding. My daughter suggested I give her my card at her ‘after wedding’ reception back in England 2 weeks later to allow more time. I chose one of my favourite pictures from the wedding as my inspiration to recreate the flowers from her bouquet. Because of the heat (40C) though we saved some blooms to press, it was impossible to keep the bouquet so I thought it would be a nice keepsake. I used tons of different dies to recreate the flowers and leaves used, I had to think outside the box mixing various bits from different brands (click on the pictures to see which ones I used and see tha last picture below). I started with a shadow box but it soon became clear that it would not be practical to make into a card so I framed it using a box frame to create a lasting keepsake which would be protected by the frame. My Daughter and new Son in law were delighted with the end result. (To see full size images, just click on the pictures)
